Lifestyle

The Treacherous Sharp Peak Hike

COVER.jpg

Sharp Peak has always been on my "To hike list". It took me years to finally conquer this treacherous hike. Why the long wait? It is mainly because of work and personal schedules, seeking a good weather to do it and also preparing myself to be fit enough to do this hike. I have only known 2 people who had done this hike before. Is it really that difficult? Let's find out!


ABOUT SHARP PEAK

Sharp Peak measures about 468m. It is located in Sai Kung. Sharp Peak has been categorized as one of the toughest hikes in Hong Kong. This spot is famous for many hikers and it also attracts beginner hikers. It is indeed a very challenging hike as it is a very steep hike and the non-stop clambering up and down the hills can be overwhelming.

Sharp Peak is visible in most part of Sai Kung. It is not hard to point out which mountain is Sharp Peak as the peak is probably the sharpest one you can see in Sai Kung. 


BASIC INFORMATION OF THE HIKE

DURATION - 7 hours

DISTANCE - Around 15-16km

DIFFICULTY LEVEL - Difficult

CELLPHONE/ INTERNET COVERAGE - Everywhere

BEST TIME TO HIKE - Winter or Autumn (Do not go during rainy season)

WATER LEVEL - 2.5L 

STARTING POINT - Pak Tam Au

FINISHING POINT - Sai Wan Village


HOW TO GET THERE AND WHAT TO TAKE

EASIEST WAY AND MOST CONVENIENT WAY TO START THE HIKE

Take MTR or bus to Choi Hung MTR (Exit C1) and take green minibus no. 1A. Get off at the last stop in Sai Kung Pier/ Town area. From there, you may take the bus no. 94 and get off at Pak Tam Au. 

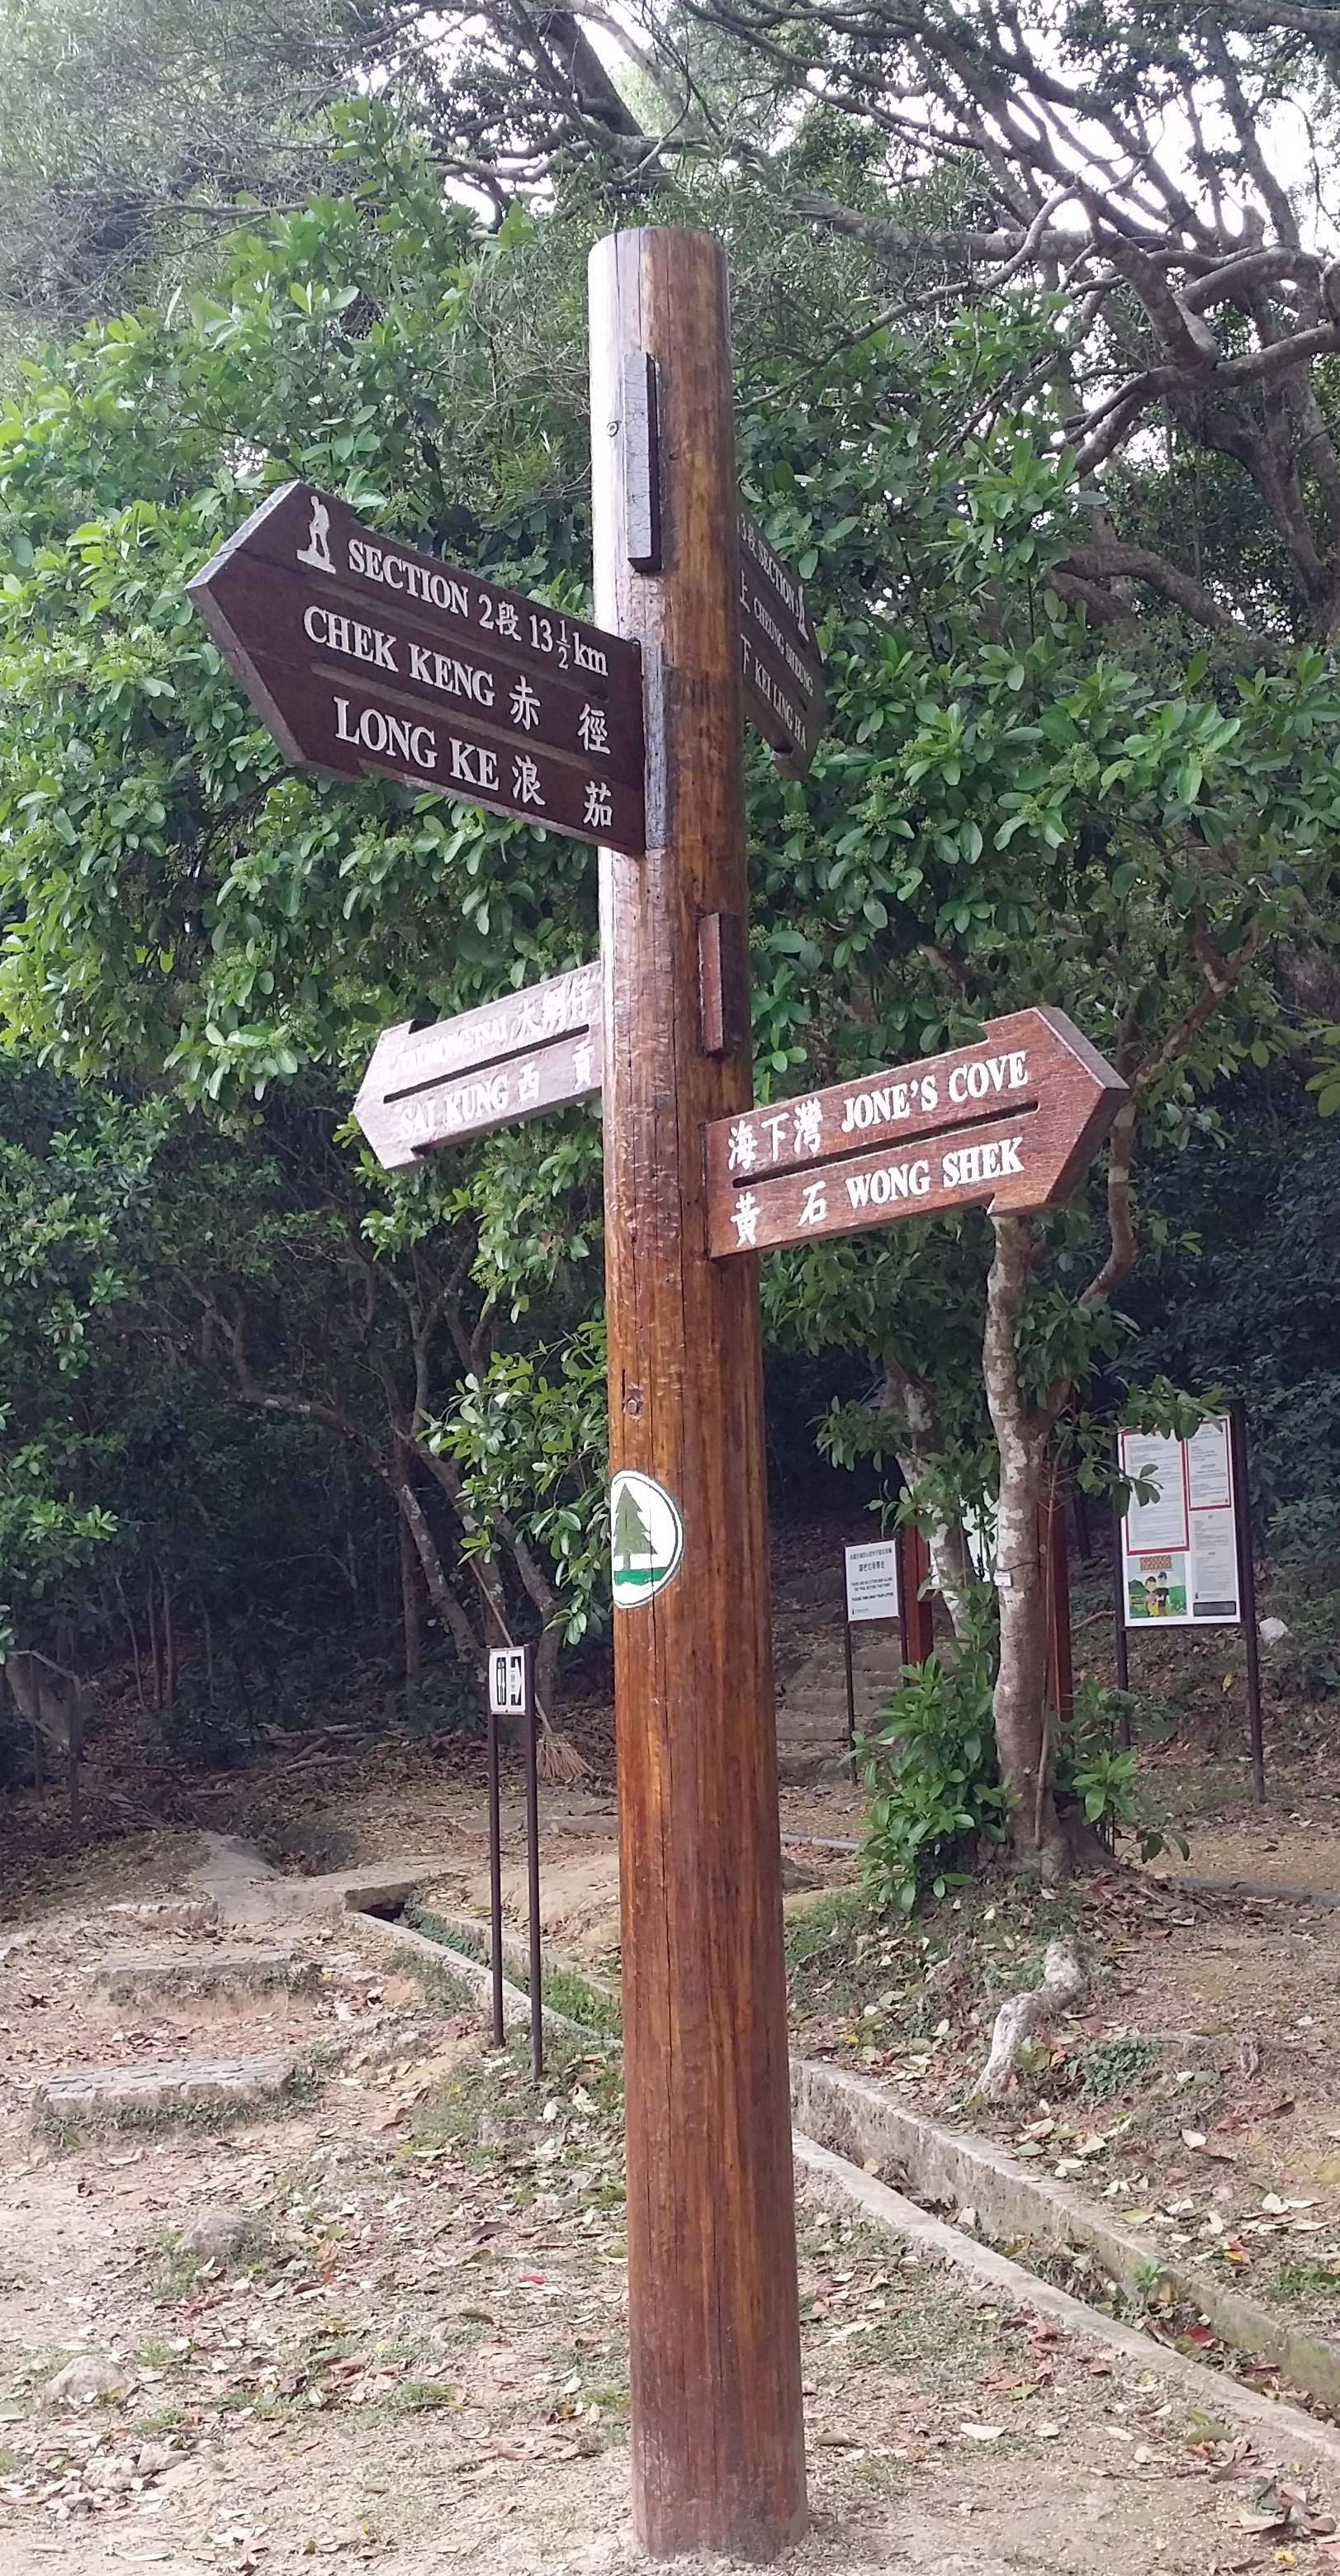
Once you get off the bus, find the sign to Maclehose Section 2 (via Chek Keng). It should be the opposite side of the bus stop. There is a public toilet for you to use before starting the long hike. 

ENDING THE HIKE IN SAI WAN VILLAGE

If you are not ending your hike back to the starting point or to Wong Shek Pier or Ham Tin. Then, you may definitely end your hike in Sai Wan Village. From the village, there is boat service to bring you back to Sai Kung Pier, however, the boat service is only available during summer and peak season. You may also take a village minibus back to Sai Kung Town. All you have to do is to hike/ walk a little bit more for at least 30-45 minutes to reach the minibus stop area. During non-peak season, there is only 1 minibus service and it leaves exactly at 4:45 pm sharp.

It is better to ask the people in Sai Wan Village for ways of transportation just to be sure. Frequent transportation in Sai Wan village varies in what season it is. 


HIKE DIARY

SAI KUNG TOWN TO PAK TAM AU

As mention in "How to get there and what to take", you may take the bus no. 94 from Sai Kung Town and get off at Pak Tam Au. You may also take a taxi ride if you don't mind paying more. The taxi fare should take around HK$90-120. If you're taking the bus, keep track on the bus stops as the bus ride goes very fast. Once you get off Pak Tam Au, you will see the Machelose signpost to Section 2. You must cross the road and look for the public toilet if you need to take any toilet break before starting your hike. 

STARTING POINT - MACLEHOSE SECTION 2 TRAIL TO CHEK KENG

The starting of the hike will take you to a straight path for about half an hour. There will be a little bit of uphill then followed by some downhill. You will pass by Chek Keng and from there you will see many abandoned houses and ruins as you pass through the area. There is a public toilet area for you to take the last toilet break before starting the difficult and long hike. 

Don't forget to say hello to some cows along the way. They are friendly and they enjoy chilling on the grass. 

QUICK REST IN TAI LONG AU

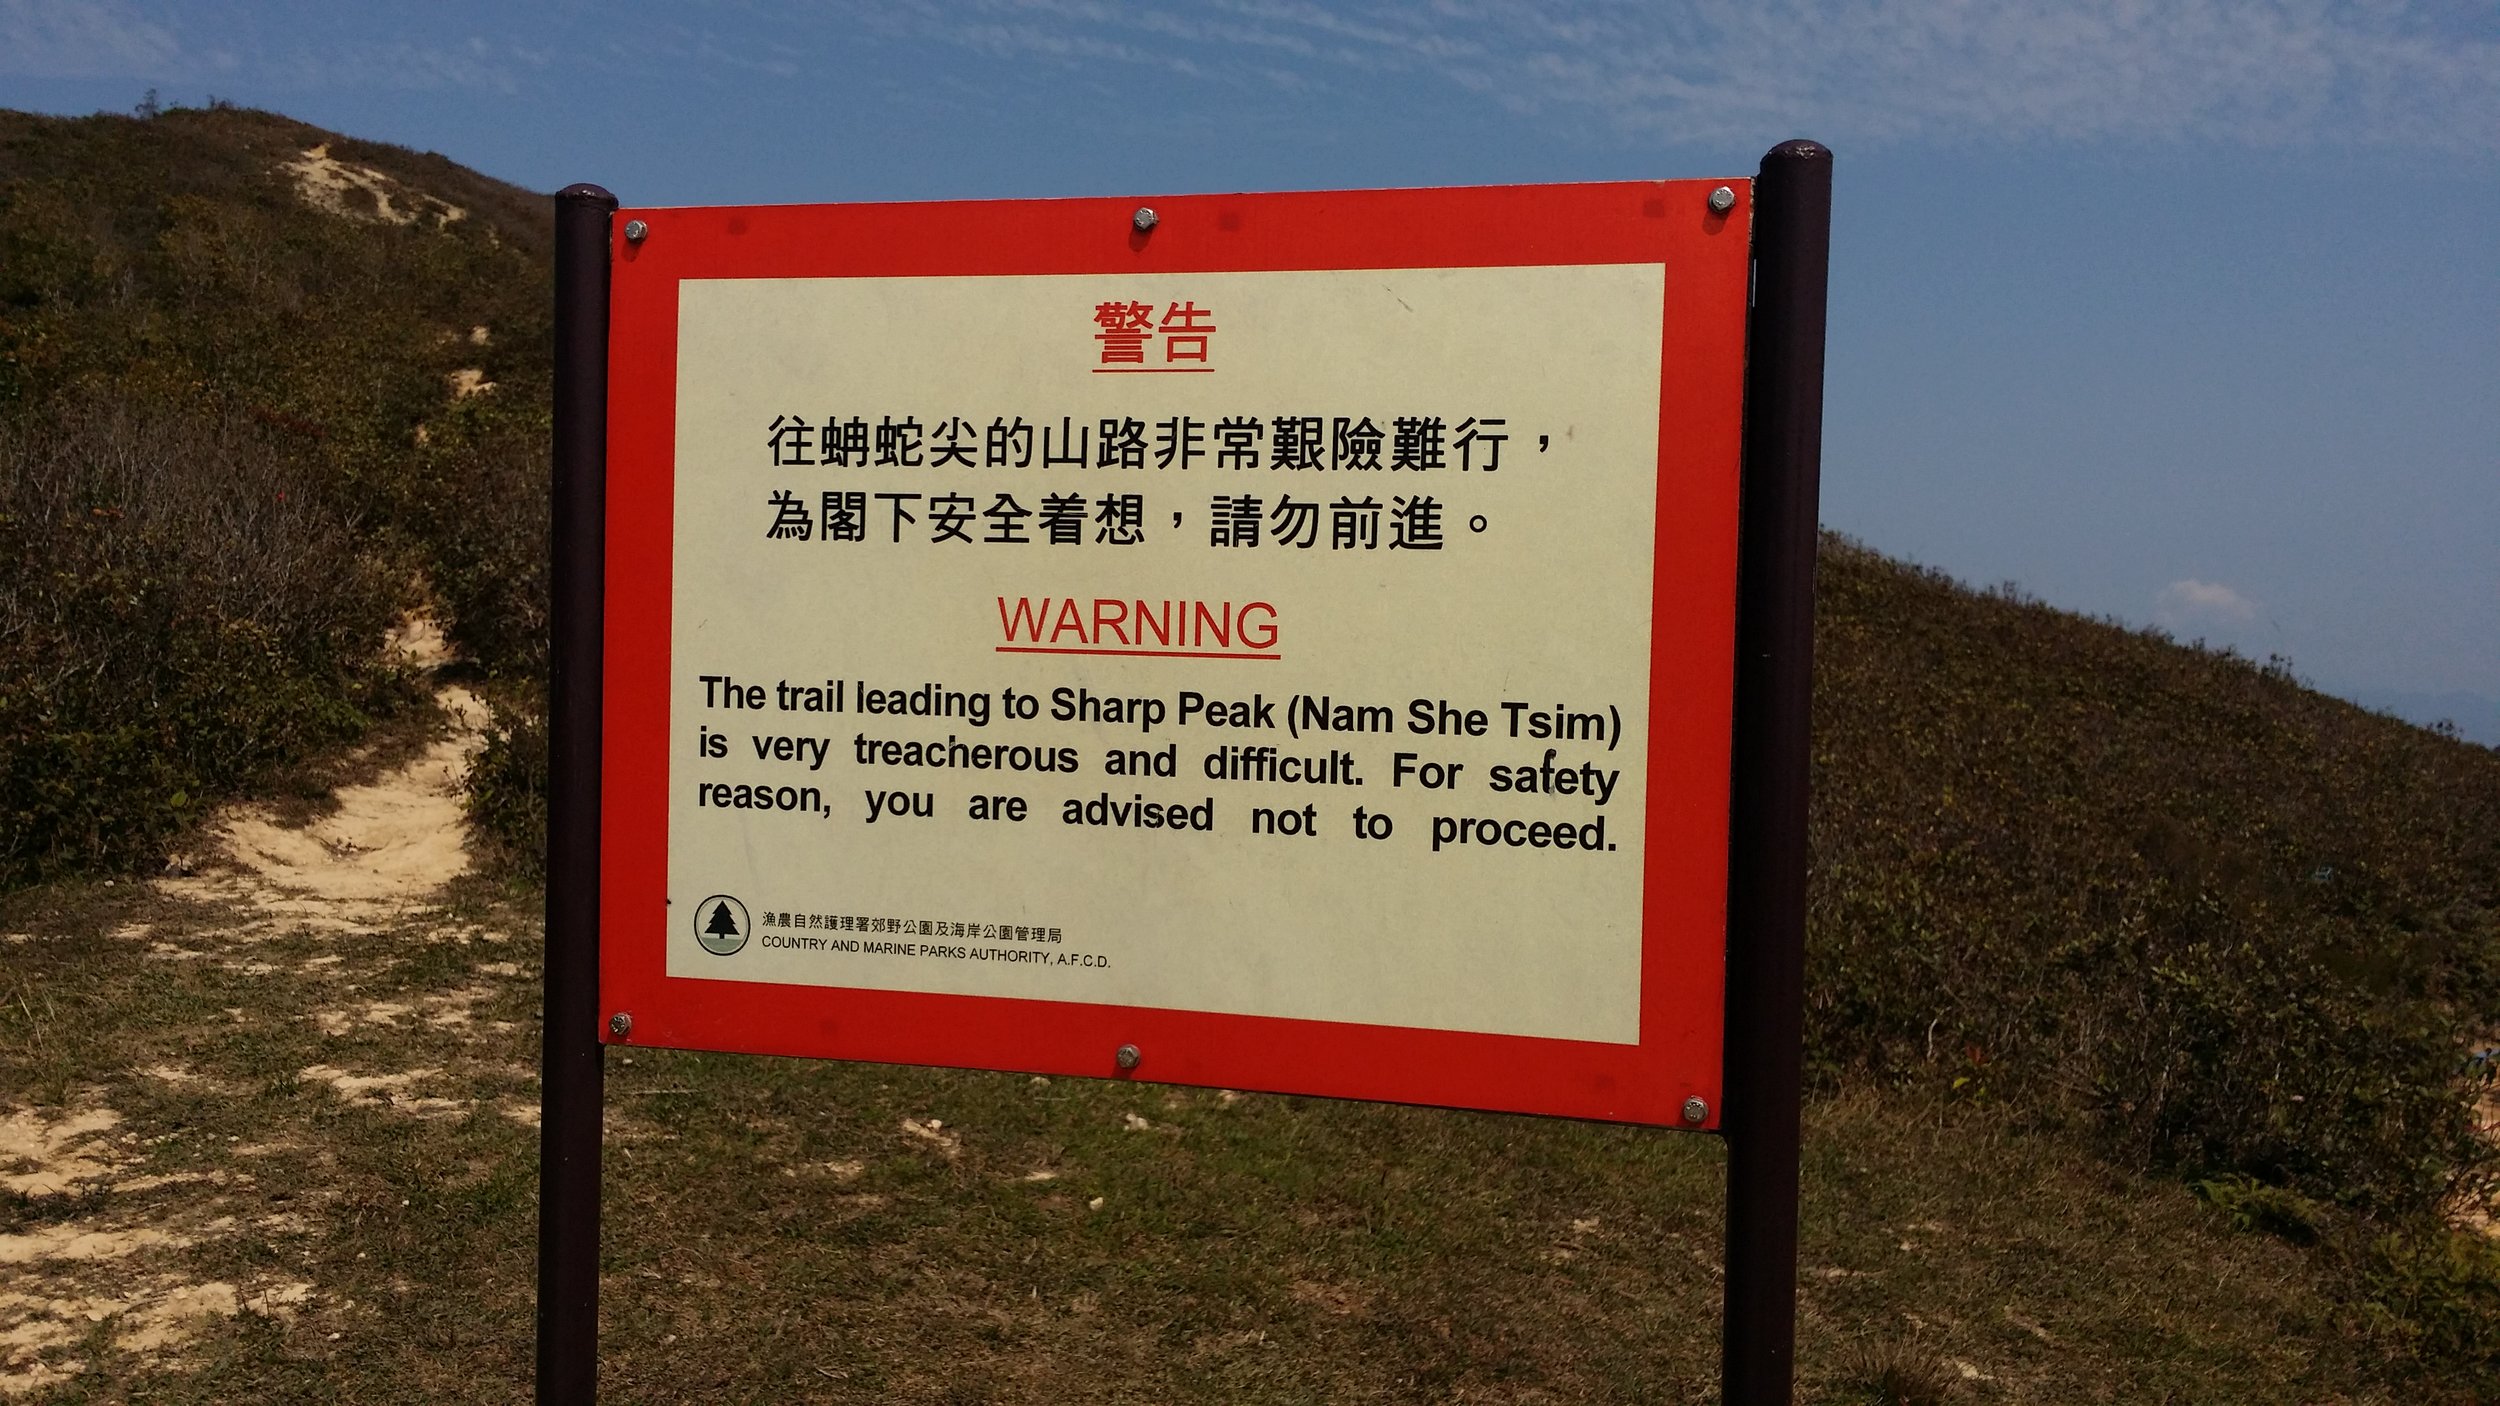
After half an hour or so, you will come across a mini pavilion at Tai Long Au. You can put down your bags and have a quick rest here. On the left side, you may see a warning sign about not proceeding the hike upstairs. In that case, you are on the right path. This is where the Sharp Peak hike begins. The reason why a sign has been put up there is that hiking Sharp Peak is not ideal for everyone. You must be prepared for this hike as it requires a very demanding one. 

WATCH OUT FOR THE WARNING SIGNS

As you walk up the unstable stairs, you will come across plenty of warning signs. Once again, you are on the right path if you see those posts. You can also follow the ribbons tied up in the stems. Once you've reached a ridge-like path, you will see a warning signpost again and you must continue hiking on the right side as that this the way to Sharp Peak. 

CLAMBERING UP AND DOWN TO SHARP PEAK

The tricky and hard part begins when you have to start clambering up the hill. It is required to maintain your balance while clambering up. The whole process took me about 1 and a half hour to finish climbing up to the top. The hardest part for me is figuring out which way is the best way to climb. Make sure not to speed up while hiking up, hike at your own pace. 

PS: Wear a pair of gloves to protect yourself while clambering up.

A LONG WAY AT MEI FAN TEN

Once you are done admiring the views from the top. You will come across Mei Fan Ten when you descend down. It is a long way down and it is very steep too. Honestly, there were many moments where I was completely sick of how this path took ages to finish. Just when you think that the hill that you are looking at is the last one, then there goes another one at back. 

You must be very patient and you must watch out where you step as there are countless of small stones and rocks in the way. Stepping on them would probably be a bad idea and would end up making you slip down. 

VIEWS OF TAI WAN BEACH AND HAM TIN BEACH

You may enjoy the views of Tai Wan Beach and Ham Tin Beach while you are on your way to Sai Wan. The beaches are very clear and not very crowded. The beaches remind of an island in the Philippines called Malaspacua Island. It is as calm and beautiful as this 2 beaches. 

ENDING THE HIKE VIA SAI WAN VILLAGE

You will know that you've reach Sai Wan when you start stepping on sands instead of small stones and rocks. Walking on the sand may tire you up a little bit more. There are 2 campsites that you must pass before reaching the village area. 

Once you reached Sai Wan village, you may take a quick rest and perhaps reward yourself with some nice snacks before hiking for another 45 minutes to catch the village minibus to bring you back to Sai Kung Town. Don't forget to ask the shopkeepers about the time slot of the minibus or you may also inquire about boat service if you do not wish to catch the minibus. 

When you are back in Sai Kung Town, do not forget to reward yourself with a nice and satisfying meal. You've just conquered one of the toughest hikes in Hong Kong. Hiking Sharp Peak is not a joke and by finishing this hike only makes you stronger. 


WHAT TO BRING AND WEAR

  • Small towel
  • Hiking pants/ jogging pants (no jeans/denim!)
  • Short/ Long-Sleeve Shirt
  • Hiking shoes
  • Trekking pole - can be useful when descending 
  • Extra shirt - for changing
  • Cap - to protect your face from sun exposure
  • Umbrella/ waterproof jacket with hoodie - in case of rain 
  • Windbreaker jacket (optional) - It will be very windy in the middle of the hike from Violet Hill path to Tse Long Bridge
  • Toiletries - tissue/ wet tissue, sunscreen, OFF spray (to avoid insects)
  • Portable charger
  • Water - 2.5L
  • Snacks - fruits (apples or bananas), boiled eggs, protein/ energy bars, digestives biscuits or bread


OVERALL EXPERIENCE

My overall experience was good and bad. Good, because I have finally conquered this difficult hike. bad, because I was extremely tired. However, it was satisfying and it was probably the best hike I ever did in Hong Kong. The only thing I did not enjoy was the countless small stones and rocks around the paths. I have no more recollection of how many times I slipped and fell on the ground because of those annoying little things. But I'm glad that I didn't injure myself. 

I wouldn't mind doing this hike again after a few years. I will surely recommend Sharp Peak to people and for those who are seeking a tough challenge. 


If you have any questions or concerns about Sharp Peak hike, feel free to leave a comment below. I will be more than happy to help. 


Yours Truly,

Michelle Chan

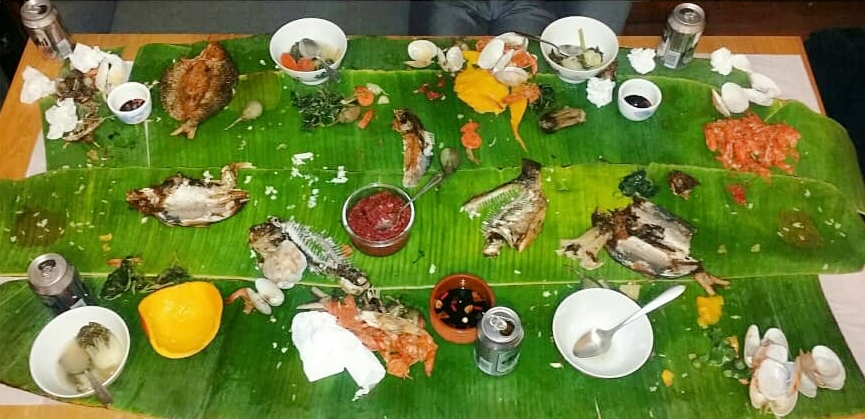
How To Prepare A Boodle Fight

Photo credit - Kenny Cheung

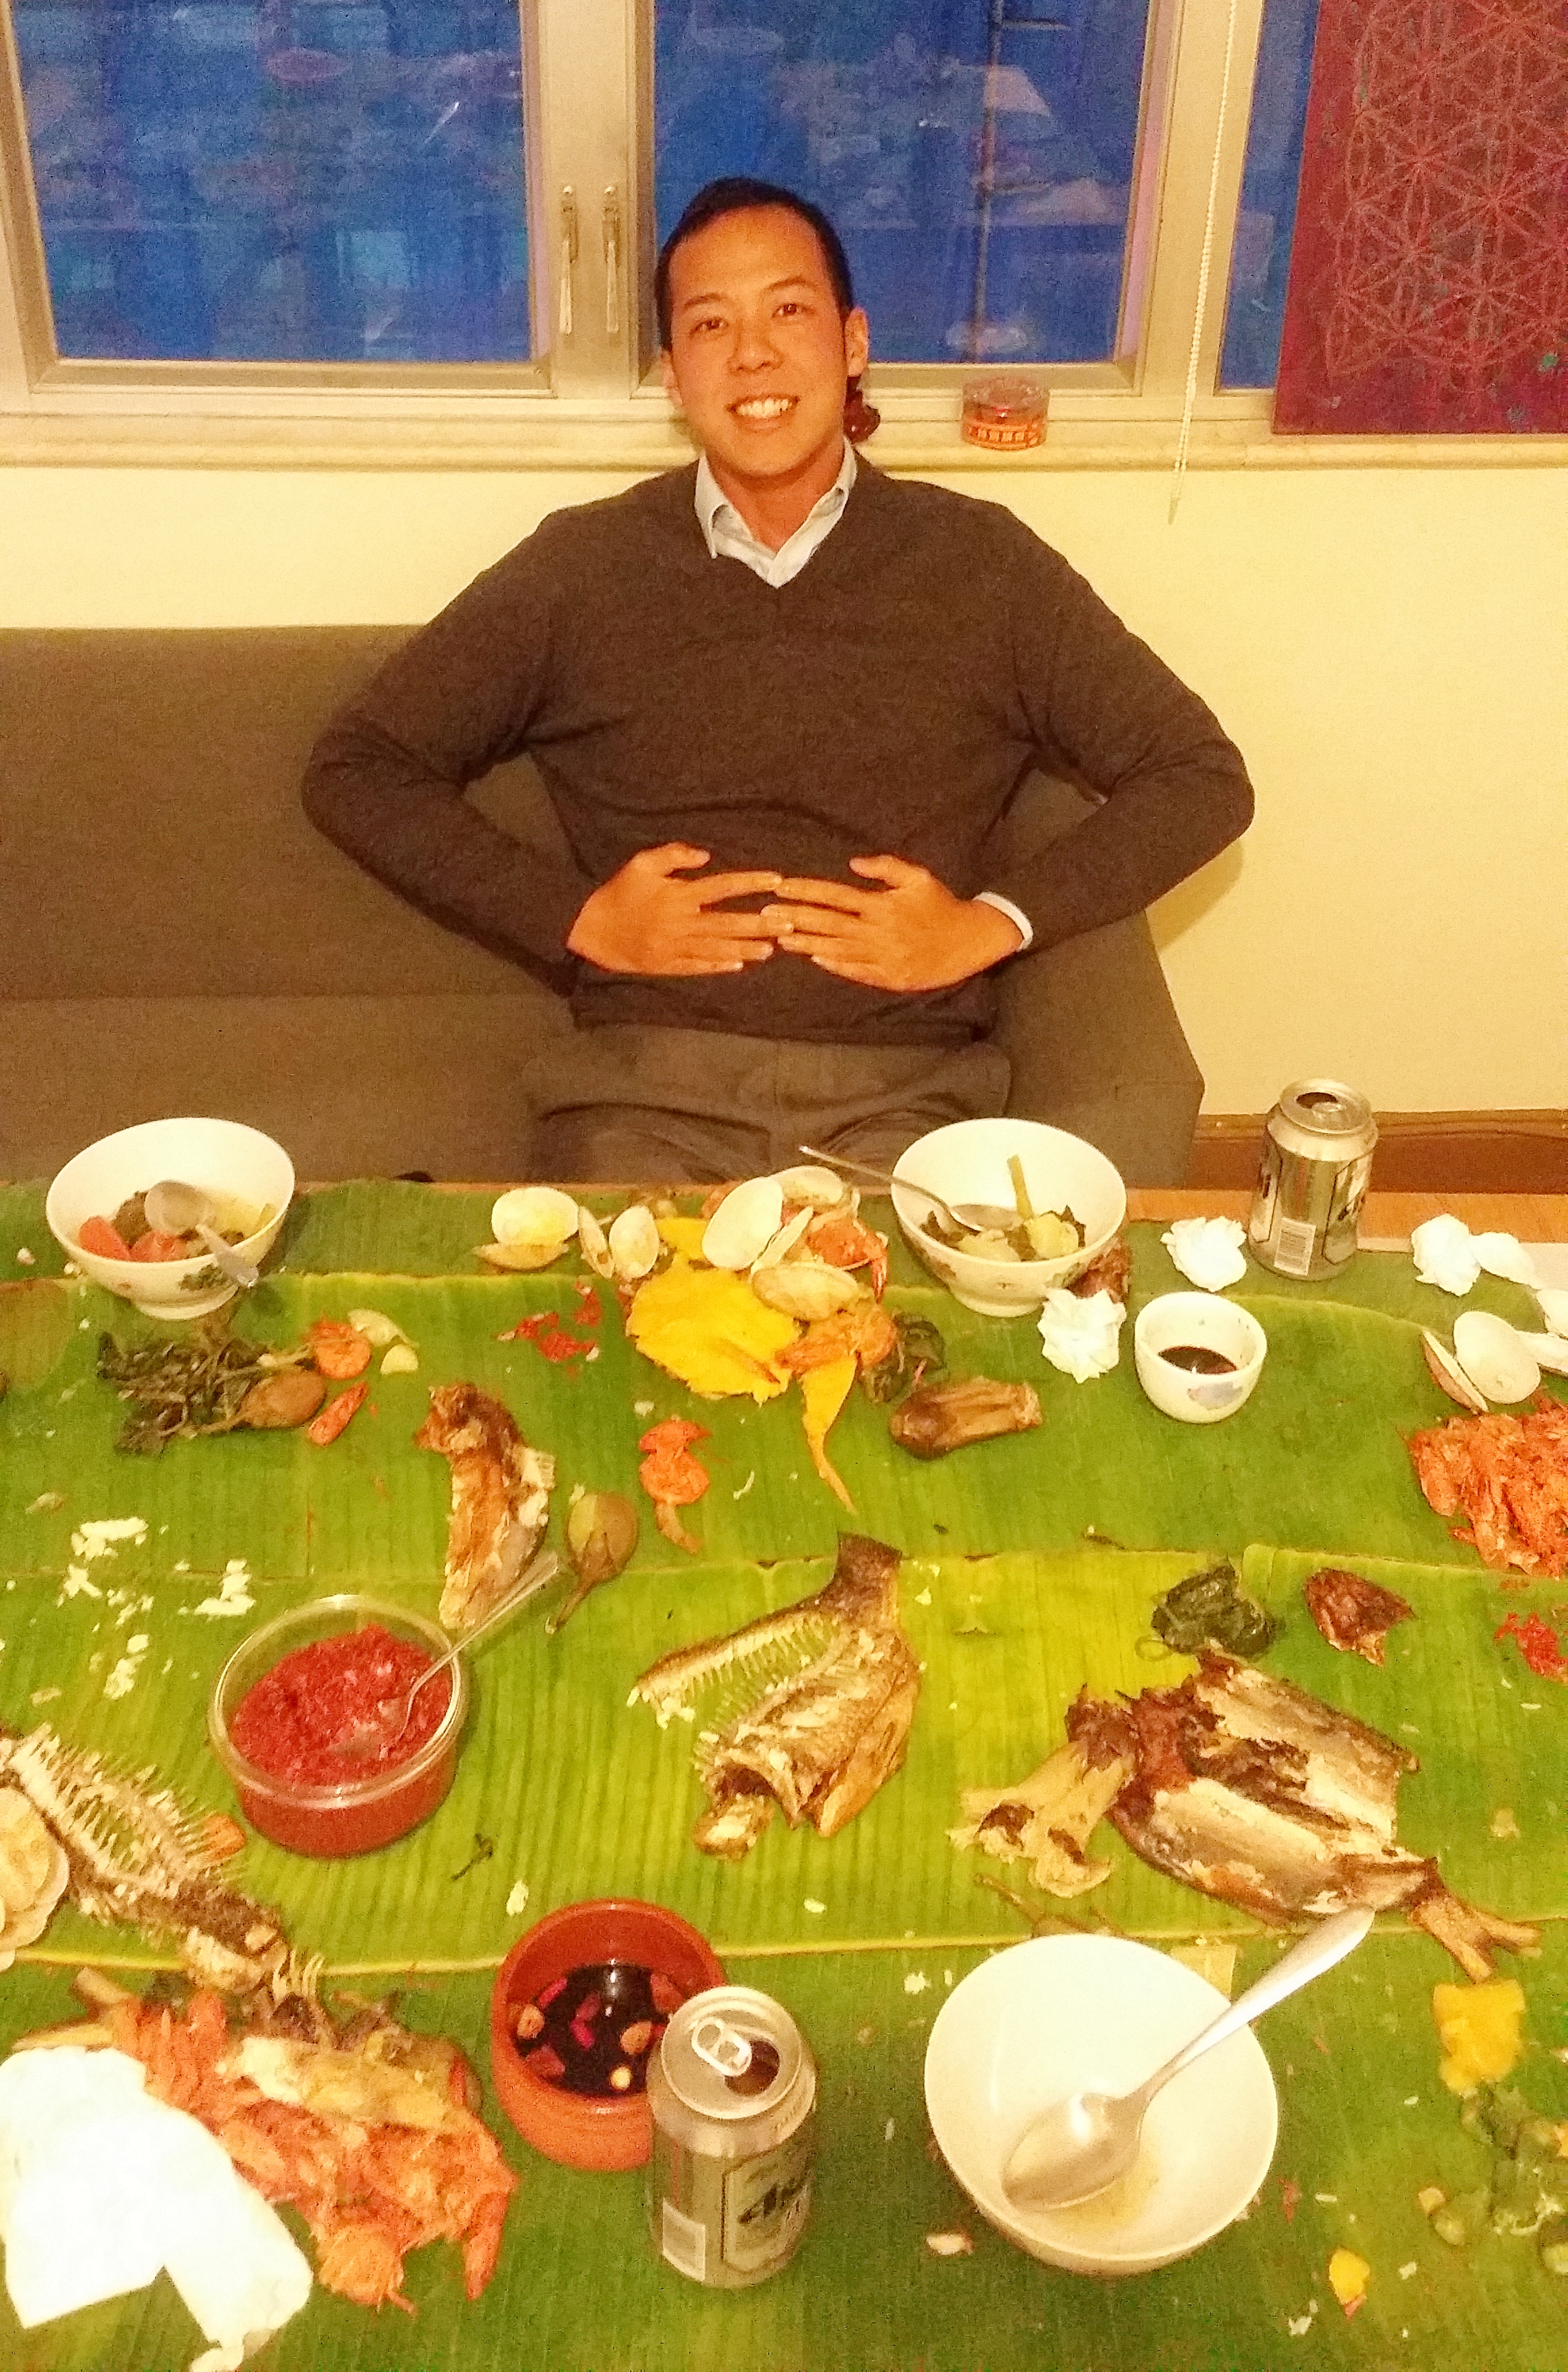
Photo credit - Kenny Cheung

WHAT IS A BOODLE FIGHT?

Boodle Fight was inspired by the military style of eating. This is a kind of feast that is meant for sharing, sharing all the food. Whilst the food is served and spread on some banana leaves in a long table. Other than banana leaves, you must use your bare hands to eat. Utensils are strictly prohibited as a sign of respect of following the old traditional Filipino culture. 

Boodle Fight does not mean it's a food fight unless of course, you want to go into that kind of level and test your friendship with your friends. However, Boodle Fight is supposed to be a friendly type of feasting and not something you stress on. 


BOODLE FIGHT RULES

Here are some of the basic yet important rules of Boodle Fight. It's not very hard, in fact, it is quite simple and straightforward. 

  • No using of utensils. No spoons. No forks. No chopsticks!
  • Only use your bare hands to eat
  • Must finish all the dishes presented on the table 
  • No toilet breaks until food are all done
  • Must try all kinds of dishes, except for those who can't eat certain dish 


THINGS YOU NEED FOR BOODLE FIGHT

  • Banana leaves - We use banana leaves as a traditional way on how to prepare a Boodle Fight
  • Aluminum foil - We use the foil underneath the banana leaves, to avoid any food or sauce spilling onto the table
  • White plastic bags - Alternate for the foil, if you are on a budget then using white plastic bags will be more ideal
  • Long rectangular table - The best way to have a Boodle FIght and easier to make food arrangements, however, using circular table could also work nicely
  • Chairs - Be sure to have enough chairs for everyone to enjoy their meal by not standing up, however, if you want to be spontaneous then you may do it on the floor by placing a low rectangular or circular table and by sitting down on the floor with some mats 
  • Tissues - This is a must to have during the Boodle Fight
  • Wet Tissues - This is also good to have while eating 
  • Containers for sauces & spices (Bowls or Tupperware) - It will be nicer to have an individual cups for sauces for everyone but it could work nicely also for sharing


WHO TO INVITE FOR BOODLE FIGHT

In case you are wondering who to really invite for your Boodle Fight, then here are some tips for you. 

THE BIG EATERS

Take note that Boodle Fight will be filled with many delicious dishes, which means all of these dishes must be finished. So inviting your big eaters' friends or families would be a perfect choice. This also means that you don't have to worry about wasting food and having too many leftovers.

WILLING TO EAT WITH HANDS ONLY

Boodle Fight means strictly no spoons, no forks and definitely no chopsticks. We use our bare hands to eat the food on the table. Make sure to pick people who are open to using their hands for eating and also make sure that they all wash their hands before starting the feast. 

PEOPLE WHO ENJOY TRYING OUT NEW DISHES

Boodle Fight is not only for the Filipinos, it is welcome for everyone to try this feast, most especially the ones who are culture friendly and who are certified food lover or what Internet would call them - "Foodie". 


BOODLE FIGHT FOOD ESSENTIALS

  • Plain Rice/ Java Rice/ Garlic Rice - Rice is a must and must not be forgotten
  • Grilled Bangus (MIlkfish) - A must have and best to marinate it days before
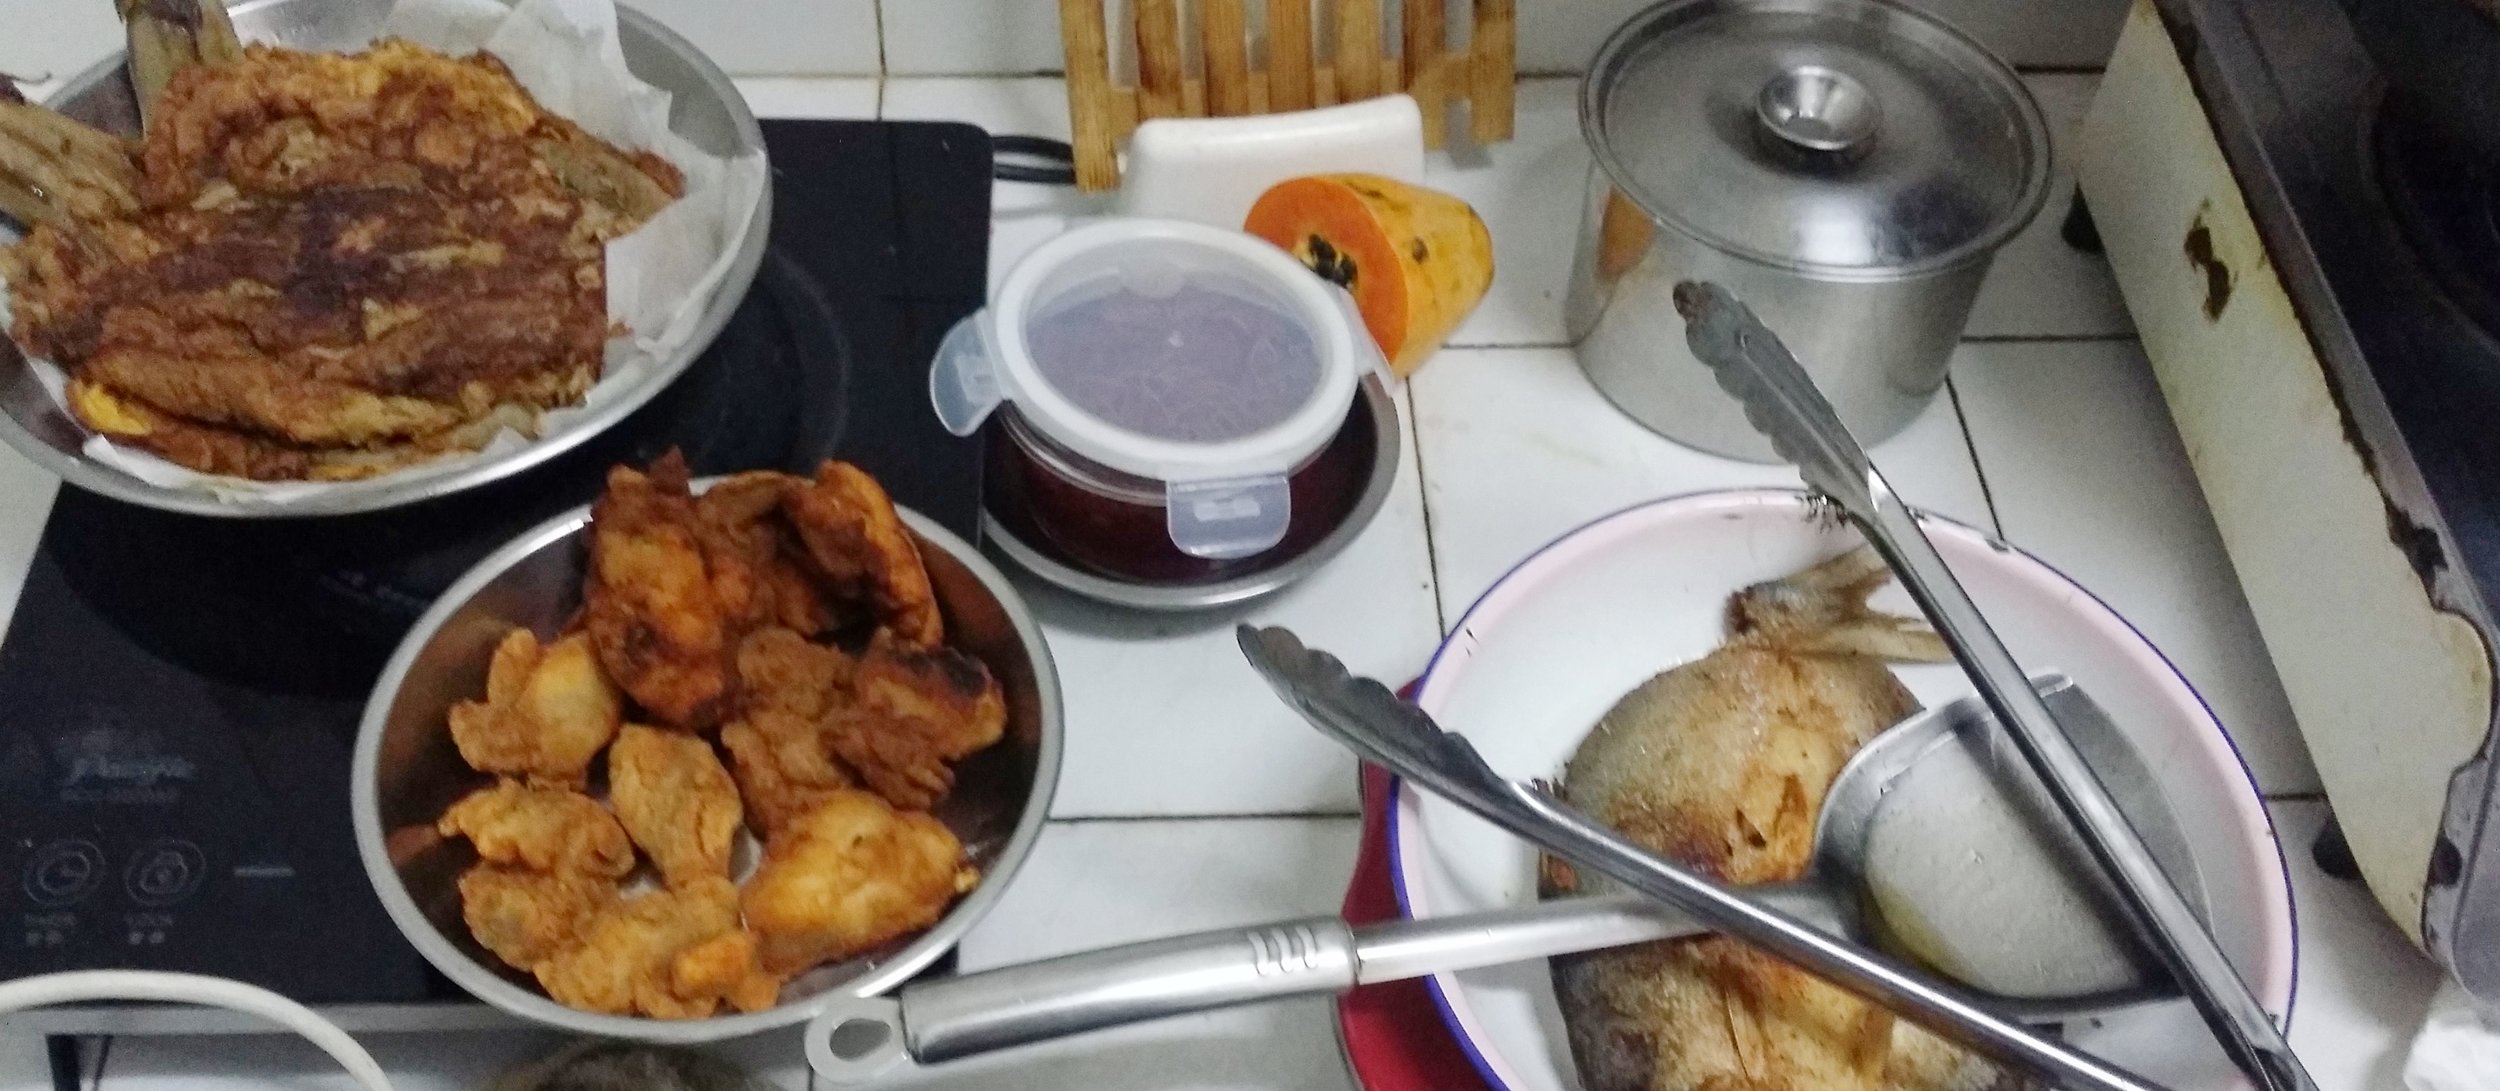
  • Fried Tilapia - A famous Filipino fish dish
  • Tortang Talong (Egg Omelet) 
  • Adobong Manok/ Adobong Pusit - Very essential and Boodle Fight will not be complete without it
  • Salted Eggs - Everyone love to have at least 1 whole piece of egg on the side
  • Pinakbet - This mix stir-fry vegetables is simple but delicious and colorful
  • Mangoes, Pineapples - Best fruits to pair with the food 
  • Blanched Vegetables (Okra, Spinach, Tomatoes, Kang Kong/ Morning Glory) - Something healthy
  • Buttered Shrimp - Something a little bit fancy
  • Bagoong Alamang Sauce - This sauce is best paired with most of the dishes
  • Pancit Bihon/ Pancit Canton - Noodles for long life!
  • Grilled Isaw - Something grilled and unhealthy wouldn't be too bad for a night 
  • Garlic, Calamansi/ Lemon, Soy & Spicy Sauce - The typical sauce for a big Filipino feast
  • Shanghai Lumpia - This dish is best served with some chili and sweet sauce
  • Beef Steak - Probably the only beef dish that is essential in a Boodle Fight


MORE FOOD TO INCLUDE (OPTIONAL)

  • Sinigang with Salmon Head - Sour soup base with Taro (Gabi) plant, best served with a piece of Salmon head
  • Tinolang Manok - Chicken soup and one of the best soup for a boodle fight
  • Bulalo - Soup with beef shanks and beef marrow, very delicious but take a long time to prep and cook
  • Clams - Clams can be served boiled, hot pan stir or grilled
  • Ampalaya with Egg - Sliced bittermelon mixed with eggs
  • Paksiw - Tilapia fish in vinegar, black pepper, and chili sauce
  • Palabok - Alternate for Pancit, however, prep and cooking time may take longer
  • Fried/ Grilled Chicken - Delicious and can always buy and cook it the very last minute
  • Grilled Squid - Alternate for Adobong Pusit
  • Suman/ Biko/ Bibingka - Some options for dessert, something sweet and light
  • Grilled/ Boiled Corn - Something to fill you up
Presentation4.jpg


My overall Boodle Fight experience was great. Oh did I mention that this is actually my first Boodle Fight in my 27 years? Yes! I have never done this before and so far my first experience went smoothly. My best friend, Diana and I planned our first Boodle FIght together at home. I cannot wait to organize another one and invite people from different cultures to introduce them to Boodle Fight. 

The picture below is the before and after pictures of our Boodle Fight 

And here are the best people who were present in our Boodle Fight

I hope this blog would be of any help in planning your Boodle Fight. Good luck on your Boodle Fight and If you happen to have any questions, feel free to send me a message. I will be more than happy to help.


Yours Truly,

Michelle Chan

Benefits of Waxing

Slide1.jpg

Are you tired of shaving? Have you ever consider on stopping shaving at some point? Shaving is probably the most convenient way to get rid of your hairs on your legs, underarm and on your private area. However, shaving comes with a lot of disadvantages. To find out why you may proceed reading this blog to know more. 

Waxing can be rewarding in many ways but can also bring you pain in the process. Just imagine, your hairs are being pulled out straight from its roots. With that being said, the results can be very rewarding though for most people. There are also a lot of precautions to follow strictly before and after waxing.

"Beauty comes at a price but I believe it will be worth it."


FIRST OF, WHAT IS WAXING?

For those who are not very familiar with waxing or want to know more about it. Here is a simple explanation of what waxing is all about. Waxing is a therapy specializes in semi-permanent hair removal while maintaining a smoother skin. It is affordable and easy to book an appointment in any waxing salon, you may also do waxing in your home too! Waxing allows you to treat yourself to a nice and smoother skin and to be completely hair free for at least 1-2 weeks. 


TYPES OF WAXING METHOD

HOT WAXING

This is the most popular waxing method and it is not super hot by the way. It is quite warm. Hot waxing is a lot easier to pull out some stubborn and even those shorter hairs. This is good for the intimate area and it would be less painful. Hot waxing is more effective than cold or pre-made wax strips. It is also much more comfortable than the others, plus you have a therapist to do all the service for you. 

PRE-MADE WAX STRIPS OR COLD WAXING

Pre-made wax strips can be found in any convenience or health care and beauty stores. The strips come in a package with a few sheets inside. It is quite easy to use as there is a list of instructions to tell you how to do your waxing. It is advisable to ask someone to help you wax instead of doing it by yourself especially when waxing your underarm and private areas to be safe. 


DIFFERENT TYPES OF WAXING

  • Bikini/ Brazilian waxing - There are some options whether you want your hairs in your private area to be all off (Hollywood), Bikini line wax only or something artsy, The Love Heart.

  • Underarm waxing - This is probably the least painful one of all and can be relaxing too

  • Legs or Feet waxing - There is an option whether you want it all off (Feet + Legs + Thighs)

  • Eyebrow waxing - This is mainly for people who have tattooed their eyebrows

  • Chest or Back waxing - This is mainly for the men


BENEFITS OF WAXING

There are plenty of benefits that waxing can provide and will let you enjoy from being hair free for at least a week or two. The process can be painful but the results can be rewarding. 

1. WAXING ALLOWS YOU TO HAVE A SMOOTHER AND SOFTER SKIN

You should know that your hairs are being pulled out straight from its roots, so there won't be any patches of hair left on your skin except those teeny tiny bits and really thin hairs that are not possible to be taken off with the hot wax. Once your hairs have been taken off, you will start to feel that your skin is very soft and smooth. Do enjoy this for at least 1 or 2 weeks before your hairs start to grow again. 

After waxing, your skin will feel not only smooth or soft but it is almost like your skin is brand new, like a newborn baby. Furthermore, you must moisturize or exfoliate the waxed area to maintain the smooth and to avoid any chances of ingrown hairs. 

2. WAXING IS CLEAN

Waxing is clean if you go to a good waxing salon. Always make sure that your waxing salon is clean and their materials and tools are new especially the waxing popsicles they use to gather the hot wax onto your skin. To maintain the cleanliness after waxing, you must moisturize or exfoliate your waxed area and make sure that your waxed area is clean and must be moisturized at least before your hairs start to grow. 

3. WAXING CAN GET RID OF INGROWN HAIRS

Waxing can help you get rid of those ever annoying ingrown hairs.

WHAT ARE INGROWN HAIRS?

Ingrown hairs are hairs that grow back and curled up down from within your skin or near the skin surface. The hairs move sideways instead of straight out from your skin. This happens when your hair breaks off in the middle by waxing, plucking or shaving, 

Waxing can eliminate your ingrown hairs and these annoying ingrown hairs are not a permanent thing, so there is nothing to worry about. Unless you stop waxing or if you are the type who wax every after 3 months or more. Furthermore, not everyone suffers from ingrown hairs. It also depends on how you take care of your skin. The more care you give the fewer problems you'll have. 

4. HAIR FREE FOR AT LEAST 1-2 WEEKS

Your hair only starts growing after 1-2 weeks. Being hairless for at least 1-2 weeks is probably a great news for everyone who goes waxing. During those hairless time, you may enjoy doing some outdoor activities and you are free to wear anything without feeling embarrassed especially about your underarm hairs. 

On the other hand, the longer you wax, the amount of hair growth will be lesser. I heard from my therapist that when you continuously wax for more than 3 years, your hair may begin to grow out after 3 weeks to one month. Of course, this will also depend on your genetics. If you are born hairy then it will take more years to enjoy this privilege. 

5. WAXING CAUSE NO CUTS THAT WILL LEAVE YOU SCARS

Waxing does not include a blade or a razor, which means you won't suffer any cuts that may leave you some scars. Waxing, however, may be painful especially for those who are more sensitive. But having no scars is definitely a good news. 


CONS OF WAXING

Waxing may offer some rewarding result, however, waxing also has its cons and it may not be 100% beneficial to all. Different people have different types of skin and to some, waxing may not be the best choice for them. Therefore, it is important to have a good knowledge about the disadvantages of waxing and not just the good parts. 

1. WAXING CAN BE PAINFUL

Waxing is never easy and relaxing. It is painful and sometimes it can make you scream especially when it comes to the intimate area. Just imagine, your hairs are being stripped and pulled out straight from its roots for at least 5-20minutes, depending on which body part you are waxing. The pain is tolerable though, however, for some people who are much more sensitive may not be able to hold their screams. 

2. WAXING CAN CAUSE INGROWN HAIRS

The chances of ingrown hairs after waxing is quite high. However, this only happens when the hair breaks off in the middle while pulling the hot waxing strip. Fortunately, you may get rid of those ingrown hairs once you are back to the waxing salon for your next session. 

To avoid ingrown hairs, you must moisturize or exfoliate your skin especially onto the waxed area to avoid any ingrown hairs. You must moisturize or exfoliate until your hair starts to grow. 

3. REDNESS AND SORENESS

During and especially after waxing, your skin may suffer from redness and soreness. This happens simply because your hairs have been pulled off and it is pretty normal to suffer from this, but worry not as this only last for a few hours and a day being the maximum. If your redness and soreness continue after 2-3 days or if you notice that it is getting worse, you must pay a visit to a doctor to have it check. 

4. PORES AND ALLERGY REACTION

After waxing, your pores will start to open up as you are hairless and the chances of having your skin infected are quite high but this doesn't happen to all people. But don't worry as you may still avoid this by moisturizing and exfoliating your waxed area. Make sure that your waxed area is not sweating so much and make sure that it is washed and clean until your hairs start to grow back. 

Waxing may also cause some allergy reaction in some people. To avoid having to deal with this, you must make sure that waxing is really suitable for you and follow the steps of before and after waxing. 

5. WAXING IS EXPENSIVE THAN SHAVING

Unlike shaving, waxing cost more than a piece of a set of blade or razor. Waxing is also more expensive when doing it in a waxing salon. You need to pay for the hot wax, the salon's services, and your therapist. However, the result may be worth it despite the cost.

6. WAXING CAN'T GUARANTEE YOU 100% HAIR FREE

Take note that waxing is only done by pulling your hairs straight from its roots. So it is not a permanent thing that your hair will be forever gone. Unless it is in your genes to have less hair, but your hair will not stop growing, not unless you go for laser hair removal or IPL. 

Nevertheless, you will still enjoy being hairless for at least a week or two. 

7. MUST DO IT IN A WAXING SALON

It is highly recommended to do waxing especially hot waxing in a good and reliable salon with an expert therapist. The reasons behind this are that you can put your trust in your therapist's hands and you don't have to worry about doing it wrong. 

On the other hand, you may also do waxing at home but make sure to have someone experienced or a family member who works in a salon to perform the waxing therapy for you to avoid any complications. 


PROS AND CONS OF SHAVING

Now let's talk about shaving. Shaving is always available whenever you need. It is easy to buy a shaver in any supermarket or convenience stores. It is very cheap and it is also disposable. It is very convenient as you may use that anytime you need to get rid of your hair. Plus, you don't need to book an appointment to shave, all you need is a razor to shave in the shower. 

However, there are more cons than pros on shaving. While I was writing this blog, I have come to a conclusion that shaving is really bad for our skin and the usage of shaving needs to be minimized. 


HERE ARE SOME OF THE DISADVANTAGES OF SHAVING:

1. SHAVING MAKES YOUR HAIR LOOK THICKER AND GROW FASTER

Shaving only cuts the hair on our skin area and the hair is not taken off from its roots, therefore the hair will grow much faster and looks thicker compare to waxing. Everyone has different types of hair and it depends on your genetics too. Normally for most people, the hair will start to grow after a day or two after shaving, which is not very helpful as you will need to keep shaving every day. 

2. ROUGH SKIN AFTER SHAVING

After shaving, your skin will feel rough and not very smooth as you only shave your hair off from the surface and not from its roots.

3. SHAVING CAN CAUSE ITCHINESS AND RASHES

Shaving can cause itchiness and rashes on your skin. The reason behind this is that if you use the wrong shaver or if not used properly, it can cause some complications. This happens when you press the razor too hard onto your skin while shaving or using a very blunt and old razor blade. 

4. POSSIBLE BLEEDING AND WOUNDS WHILE SHAVING

Shaving can cause bleeding and wounds too. Why is that? First of all, you are doing it alone and you can't really see the area where you are shaving, the intimate area in particular. Careless shaving could result in bleeding and wounding your skin and trust me it is not a good thing wounding your skin with a piece of sharp blade razor. 


WHEN IS THE RIGHT TIME TO WAX?

THE BEST TIME TO WAX

  • A week after your monthly period is over

  • Do it whenever you feel like you are ready for it

  • Make sure to make an appointment in the waxing salon, so you will feel more obligated to go

  • Do it in the first week of the month right after you've received your monthly salary, so you won't end up spending your money for your waxing just in case

WHEN NOT TO WAX

  • Do not wax when you are in your period

  • Do not wax days before your period, your skin is more sensitive and it can be very painful

  • Do not wax when you are dealing with some infections on your skin

  • Do not wax when you are short of budget, it can wait

  • Do not wax when your hairs are still very short, it is advisable to grow your hairs at least 1/4 of an inch

ASK YOURSELF WHEN IS THE RIGHT TIME

You should definitely ask yourself whether you are ready to switch and try waxing for the first time. Everyone has their own tolerance for pain and no one else knows your pain tolerance better than yourself. Another way to help you decide is to ask the people you know, perhaps one of your family members or friends who have already tried waxing and ask questions about it. It will sound more convincing hearing the experiences of the people you personally know. 


DO's AND DON'Ts BEFORE WAXING

This is the first step that everyone should know before having their first wax. Believe me, I had searched about waxing many times before making my first appointment in a waxing salon. It's better to be safe than sorry. 

HERE ARE SOME TIPS ON WHAT TO DO AND NOT TO DO BEFORE WAXING: 

  • Do not shave at least 2 weeks before your waxing appointment. Leave the hair be.

  • Do not wax a week before your period starts as it will be a lot painful when stripping hairs from your skin.

  • Grow your hair as long as possible (around 1/4 of an inch long should be okay).

  • Workout or sweat as much as you can before waxing as you are not allowed to sweat after waxing for at least 48 hours.

  • Try to relax and stop over thinking before and during your waxing session

  • Research about waxing, everyone has its own ways to find things out.

  • Check with your dermatologist if you have any skin problems to see if waxing is suitable for you.

  • Hydrate yourself before and even after waxing

  • Wear something comfortable and not tight clothing before heading to the waxing salon. Wearing tight items of clothing will suffocate your body to sweat.

  • If you are sensitive to feeling any pain, take an aspirin 30 minutes before your waxing appointment. Aspirin can help ease the pain but always check with your doctor before you take any medications.


DO's AND DON'Ts AFTER WAXING

After all the stripping and pain from the salon, you may see the results right away. Your skin will feel a lot softer and smoother, maybe a little bit of redness or soreness but that is very normal as it will go away eventually. However, there are some precautions to follow after waxing. It is important to follow it to avoid any possible pain, side effects or even swelling. 

HERE ARE SOME TIPS ON WHAT TO DO AND NOT TO DO AFTER WAXING:

  • Do not do anything active after waxing for 48 hours. No workout, no running and avoid any sexual intercourse too. Your skin (waxed area) needs to be dry for 24 hours.

  • Do not wear any tight clothing after waxing

  • Drink plenty of fluids, try to avoid any alcoholic drinks. Detox yourself for at least 48 hours.

  • Moisturize or exfoliate after waxing (24 hours later) to maintain the smooth on the waxed area in your body.

  • Use moisturizer to avoid having any bumps, ingrown hairs or pimples on the waxed area.

  • Do not wet or shower for 24 hours after waxing. The waxed area needs to remain dry.

  • Do not go to the beach for tanning for some time as the sun damages your skin and especially on your waxed area. Avoid the heat completely if you can.


HOW TO FIND A GOOD WAXING SALON

Finding a right and reliable waxing salon is very important. Knowing how clean and updated the salon is very important. 

TIPS ON HOW TO FIND A GOOD WAXING SALON:

  • Make sure that the salon is clean in and out

  • Read their customer's feedbacks to have an idea of what kind of salon it is

  • Check the prices and make sure that it is not too cheap. The average price should be around 45-60 USD ($350-500 in HKD) for a session of Brazilian waxing.

  • Check if the salon is recommended by the media or in the magazines

  • When you reach the waxing salon, normally clients will be given a few minutes time to change before starting the waxing session. Take this chance to check their tools and types of equipment on the counters. Check whether the tools are new, especially the waxing popsicles that they use to gather all the wax. If it is clean and you feel safe, then go on to your waxing session. By any chances that you are in doubt, you can change your mind before it's too late or you may ask questions with the salon for some clarifications. Afterall safety should always come first.


MY WAXING EXPERIENCES

I have thought about whether or not I should ditch shaving and open myself to the waxing world for many years. It took me years to make a decision because I was scared of the pain first of all and just imagining the process always back me out. Another thing is that I was not willing to spend so much money on this. It was a long and careful decision that I have dealt with. 

Anyways, I started waxing in 2016 and I am still continuing it. After finally getting rid of shaving, I finally realized that waxing is more effective. It makes my hair a lot thinner and the length are almost aligned together. I felt cleaner and better with waxing, although the pain can be unbearable at times, however, it is all worth it. 

I have tried 3 waxing salons in Hong Kong before settling into a permanent one. I am currently having my wax done at NUDE WAXING BOUTIQUE. This salon is very reliable and I love the service of my therapist, Ilhaam. She is very professional and she does her waxing very well. Nude offers reasonable prices and the machines, tools, and types of equipment they use are clean and safe. I will highly recommend this place to anyone. 

I would definitely also recommend people to try waxing and quit shaving for good. Honestly, those razors aren't good for our skin and it is also nice to treat yourself to a waxing salon. Forget the pain, just focus on the good results. 


I hope you find this blog useful and it answers your questions. Feel free to message me or comment below if you have any concerns or questions, I will be more than happy to help. 


Yours Truly,

Michelle Chan

9 Ways To Get Organised

Have you ever felt disorganised lately? Have you thought that maybe you should start to be more organised to get things done easier and efficiently? Have you ever wonder when and how to start? Here are some ultimate tips for you to have an idea of how to be organised.

Before that, I want to share something first. In case, some of you might wonder why I created a blog like this. Well, the simple answer would be because I am a very meticulously organised person and I like to have everything - small or major things organised as I hate being messy and not being able to find my things whenever I want to. It is also because I dislike getting late for work or gathering simply because I can't find that one or two particular things.  So I decided to create this blog, hoping I can be able to help people who want to be more organised but don't know how and what to organise. The tips below are in no particular order. You may follow my suggestions, or you may also do a DIY according to your style or convenience. 


TIP #1 - SORT OUT YOUR FILES IN YOUR LAPTOP OR COMPUTER

I am pretty sure that no one wants to see a complicated and messy looking desktop screen in your laptops or computers, but I know quite a ton of people who probably have this problem. It would be nice to spare some time for at least an hour to sort out your files. Make sure to separate your data into different categories. For example, sort out your Movies, TV series, Documents, Music, Personal records, Work or school stuff and other stuff you may want to add into separate folders. How to do that? Here's a sample in the picture below.

Left picture - Sample of how to sort out your files in your laptop/ computer.Right picture - Sample of how to sort out your Movies or TV series files when you have too much of it.

Left picture - Sample of how to sort out your files in your laptop/ computer.

Right picture - Sample of how to sort out your Movies or TV series files when you have too much of it.

Another tip, I update my files every 2 weeks and I also back up all of my files into a hard disk.


TIP #2 - LABEL YOUR STUFF

You should consider putting labels onto your stuff to make it easier for you to find things. This method is highly recommended when you keep a lot of boxes, plastic containers or mini drawers.

There are three ways on how to make labels. You may buy a label machine from the stationery shops. Then, you type down your name, then click the print button, a piece of sticker will come out. Cut and stick the label to your designated container. Another way is to use your laptop to create a file by using " Microsoft Word". Then, type your name, and then you may print them out using sticker papers or an A4 size paper to stick it to your containers using glue or cellotape.  

I label majority of my stuff. I find it easier to find my belongings, to be honest. 


TIP #3 - GET A PLANNER

Keeping a planner, in my opinion, is extremely useful. Not only it helps you to be more organised but also to help you keep track of the essential things. Keeping a planner is highly recommended, especially for people who have a hectic schedule and precise tasks that need to be done with specific deadlines. You will be surprised at what and how much you have accomplished when you look back at your planner. Always find a time to work on your planner. You can spend less than 15 minutes to sort out your weekly plan; 15 minutes is not a lot of time. No more excuses!

I find it so helpful using a planner. I write down everything that I need to do, and I make sure I do the tasks that I have written down. I don't feel like I am missing out on anything, simply because I keep track on my planner every other day. 

I have used quite a few planners in the past, but I had only stuck with one excellent planner just three years ago. I would highly recommend "Passion Planner" because they have fantastic layouts, and there are many things for you to write down to help you organise yourself. This planner is legit, I promise!

Check out their website to find out more about their excellent planner www.passionplanner.com


TIP #4 - SEPARATE YOUR CLOTHING IN DIFFERENT WAYS

I would highly recommend everyone to sort out your clothes into different types of clothing. For example, organise your tops, bottoms, undies, outerwear, outdoor wear, sportswear and socks separately inside your wardrobes or drawers. Trust me on this, and it will make it easier for you to look for your desired clothing whenever you need them. There is also another way of maintaining tidiness and cleanliness of your clothes by storing them in good condition. I have experienced myself to have a messy wardrobe, and It is a disaster. 


TIP #5 - MAKE A SCHEDULE TO TIDY UP ALL YOUR BELONGINGS IN YOUR HOME

Try your best to find some time to schedule a time to tidy up and re-organised your crap; I mean your belongings! Nothing else feels better than to have your stuff stored in an ethical and tidy condition. Just don't be lazy and start sorting out your belongings. 


TIP #6 - STOCK UP

There are a lot of things you can stock up in your home. For example, buy some spare toothpaste, toothbrushes, toiletries, first aid kits, food supplies, essential home tools, emergency kit and anything else you may need. Stocking up things into your house is good as you never know when you might need them and if you have a busy lifestyle, it is smart to say that you should never leave your cupboards empty. 


TIP #7 - STORE YOUR LEAST ESSENTIAL THINGS IN BOXES

What are the least essential things exactly mean anyway? To put it in a shorter form, It is the "things you frequently use or never use". I can't name any particular least essential things as everyone has different preferences on the things we use and don't use. I would suggest making a list of the things you don't frequently use or even need at all for the time being. Once you're done making up your list, then you should be able to know what are the things you most likely need. After you are done sorting out, you can store your least essential belongings in boxes or plastic containers. There is no need to keep those things around in your home when you barely touch or even look at them. It can save up a lot of space, and it can also make your home look nice and clean. 


TIP #8 - CREATE A BUDGET FILE IN YOUR LAPTOP

Keeping a budget file concerning your money would be a good start to keep track of your money, including your savings and expenses. You will be able to see how much you have to spend for the month and how much you are saving. 

Let me share something. I was having a lot of difficulties to budget or to even stop myself from spending. So one day, I created a personalised budget file by using "Microsoft Excel". Ever since I started, I manage to decrease my spending and save more money. I think everyone should keep track of their money. I think this is just very essential to everyone. Just make sure that no one else has access to your laptop or computers. Make the file or the folder private just in case you lost your gadget.

Here's a sample template of the budget file that I had made. Feel free to download the file if you need it.

If you wish to download the Budget Plan template, feel free to click this link - Budget Plan to download the file to get started on your budgeting. Hope you find this is useful and Good luck! 


TIP #9 - ALWAYS PREPARE YOUR STUFF IN ADVANCE

Please take note that this is not an act of uber crazy or even close to being OCD (Obsessive-Compulsive Disorder). I would call this "Saving precious time". I believe it is best to prepare your stuff in advance. Take this as an example. There are plenty of times when you always find it hard to leave home on time for work or doing other personal errands. The problem could be you may have taken such a long time looking for your outfit, jewellery to put own or so on. It could also be because you woke up late and there is only less time for you to prepare before heading out. It is always the best choice to prepare your stuff for the next day, one day ahead or the night before. Don't worry about what other people would think, remember this all the time "Saving precious time". 


I hope you find these tips useful and effective. Please feel free to leave me a comment below or email me at michellesochan@gmail.com for any further questions you may want to ask. I will be more than happy to help.


Yours Truly,

Michelle Chan

Beach Essentials

Have you ever encounter a moment when you have no clue on what to bring to the beach or that maybe you might be carrying more than you should be? Well here's an ultimate guide of what you need and what are essential to bring when hitting the beach for some relaxation and sunbathing.

I know quite a bunch of people who tend to over bring stuff to the beach though most of them do not do that intentionally. I guess some people don't know or have no clue what to bring. Therefore I thought of writing a blog about it, and hopefully, this could be of any help to anyone who needs it or know someone who does.


WHEN TO HIT THE BEACH

So when do we start hitting the beach? It has to be during the summer season, of course. If you enjoy being in the crowd, then weekends would be the best option for you. While if you prefer some peaceful yet relaxing beach moment, then you should go during the weekdays, where it is less crowded. 

Secondly, make sure always to check your local weather forecast a few hours before you head to the beach - depending on before your travel journey to the beach you're planning to go. 

Take some time to plan some beach, sunbathing sesh or picnic with your best pals. This beach day does not only help you relax, but it also allows you to bond with your friends, especially if you barely meet them due to your busy schedule.

According to the scientific experts, it is advisable to head to the beach during morning time in between 8:00 am to 11:00 am. These time around is good timing if you are after sunbathing as it is safer to stay under the sun during morning time to avoid some possible skin complications or skin disease and some other health issues that may affect you. Avoid going for sunbathing during the sun's prime hour, that's around the afternoon time.

Be sure to always apply some sunscreen from time to time to protect your skin.


BEACH ESSENTIALS (THINGS YOU REALLY NEED)

  • TOWEL (for showering)

  • BEACH TOWEL OR BEACH MAT

  • BIKINI OR BEACH SHORTS & TANK

  • A PAIR OF SUNGLASSES

  • EXTRA CLOTHES (optional)

  • A PAIR OF SLIPPERS

  • PORTABLE CHARGER (for your mobile phone, optional)

  • A SMALL BOOK TO READ (If you fancy reading, optional)

  • CAMERA OR MOBILE PHONE CAMERA

  • SHAMPOO & SHOWER GEL (in small containers)

  • SUNBLOCK LOTION OR TANNING LOTION

  • EXTRA UNDERWEAR, BRA

  • COMB OR BRUSH (for hair)

  • A PLASTIC BAG (for wet clothes)


EXTRA THINGS THAT ARE NOT ESSENTIAL BUT COULD BE USEFUL

  • CARD GAMES (such as playing cards, Monopoly Deal, UNO, etc)

  • A SMALL BOTTLE OF COLOGNE/ PERFUME (if you want to smell good)

  • A SMALL BOTTLE OF LOTION (ALOE VERA - good to apply on your skin after sunbathing)

  • BLUETOOTH SPEAKER (if you want to share your music with other beach-goers)

  • A PAIR OF EARPHONES (if you want to listen to your own music privately)

  • WATER SPRAY (this is good to spray off your face and body while sunbathing to cool yourself down)

  • ESSENTIAL MAKE-UP SET (for people, who can't live without applying make-up)

  • INFLATABLE FLOATS (some relaxation in the water)

  • BASIC INFLATABLE PUMP (OPTIONAL - some beaches may have pumping services)

  • SMALL UMBRELLA (in case of rain or too sunny and hot weather)

  • LITTLE SNACKS AND DRINKS (in case you get hungry and don't want to leave your spot to buy some food or if there's zero food stall on the beach you're going to)


WHAT "NOT" TO BRING OR WEAR

  • YOUR ENTIRE MAKE-UP KIT (for once be natural after spending your day at the beach, pease don't bring your entire kit, especially when you are just heading back home)

  • YOUR ENTIRE COSMETICS (just like what I have mentioned above, be natural)

  • BRINGING MORE THAN 2 OUTFITS (you're not doing any photo shooting, so bringing 1 outfit should be more than enough)

  • BRINGING OR WEARING TOO MANY JEWELLERY (trust me, you'll feel lighter and you might even lose it accidentally)

  • DON'T WEAR HIGH HEELS OR WEDGES (that is just unnecessary and it is not the most comfortable footwear to wear at the beach)

  • DON'T WEAR SHOES (not unless you want to have sands as souvenirs inside your shoes)


TIPS ON HOW TO FEEL LIGHT AND CARRY LESS CRAP (OR THINGS!)

  • WEAR THE SAME OUTFIT (wearing the same outfit on the way to the beach and leaving the beach would be for your own convenience as you can save space in your bag and the weight of your bag too)

  • CARRY ONE BACKPACK OR TOTE BAG (it will be nice to carry just one bag or a tote bag so it will be hassle-free and you only need to check on one thing whenever you are away fromt your spot - if you're in the water)

  • SEPARATE YOUR THINGS IN SMALL PURSES (stuffing everything in your bag would be a bad idea. Not only it will look messy but it will also give you a hard time finding your things)

  • BUY SNACKS OR DRINKS WHEN YOU GET TO THE BEACH (it will make you feel a lot lighter if you don't bring your snacks or drinks on your way to the beach. Not unless there isn't any food stall at the beach you're going to or you're planning a beach/ picnic date with your loved ones)

  • SHARE SUNSCREEN LOTION, SHAMPOO AND SHOWER GEL (it's good to have at least one person to bring one of these, so it can reduce everyone some weight in everyone's bag. Not unless you have to use a specified brand for personal reasons or if you are going alone)

  • BRING A SMALL WALLET/ PURSE FOR MONEY, CARD AND PERSONAL ID (trust me don't bring your big wallet, it will save a lot of space storing your money and cards into a smaller wallet or purse.)


I hope you find these information useful and I hope this could help you organise yourself when heading to the beach. If you got any other questions, feel free to leave a comment or send me an email. I will be more than happy to help!


Yours Truly,

Michelle Chan